Tools dos and don’ts


SilverWorks Studio 2: hot metal

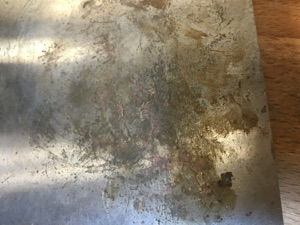

Rusted anvil.
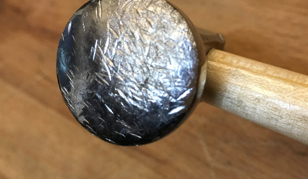
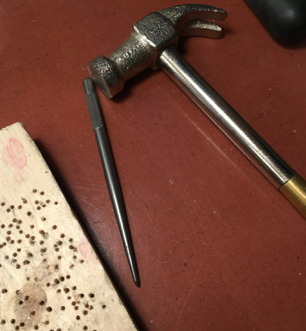
No steel on steel! This hammer was used with punches or stamps which completely trashed the surface. Choose a designated hammer for stamping and center punching.


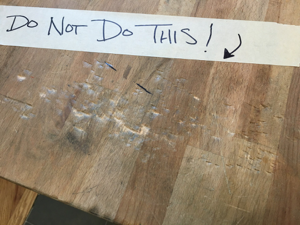
Don’t use the wooden benches as a hammering surface. This new butcher block was TRASHED when someone neglected to put down a hammering surface.
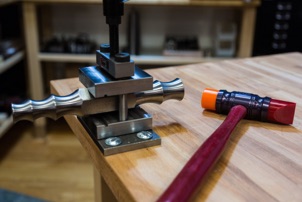
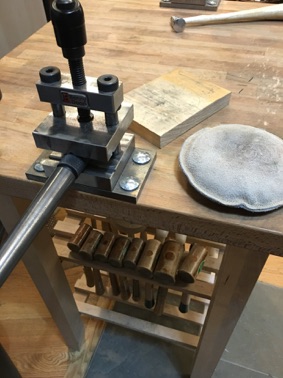
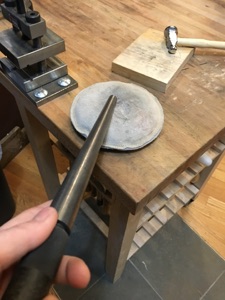
Put your mandrel in a vise or support with other wood block or sandbag for hammering (seen below).


A new pattern plate vrs one that has been rolled too tight. Follow the instructions for rolling on the mill. Do NOT just feel it!


Bonny Doon forming stakes are used in the vertical vise with the urethane hammers ONLY. No steel.

tool rules
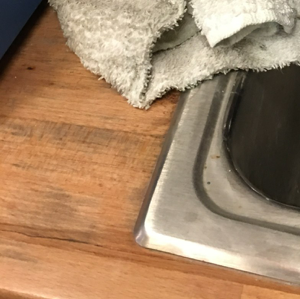
Wet towels left laying by the sink or standing water wrecks the wood countertop. Hang up a wet towel to dry before putting it in the bin and wipe up standing water.
Be a
tool LOVER
not a
tool TRASHER!


Tools dos and don’ts
To keep the studio in tip top shape here are a few “good practices” to keep in mind.
Steel tools and water don’t mix well, thus:
• no tool at soldering bench
• dry all pickled and rinsed metal before working on it with ANY tool
Hammers:
steel on steel hurts- don’t do it
• hitting a steel stake/mandrel/anvil with a steel hammer causes a dent in both the stake/mandrel/anvil and the beautifully polished hammer that was used to hammer with. There must be silver, copper, or brass between any two steel tools
• use a designated ball peen (ugly hammer) for stamping
• use a designated brass head hammer for disc cutters
• use a designated hammer for center punching*
(* making a divot before drilling)
• use rawhide mallet for metal dapping punches
Filing:
• filing in the backward direction only dulls the file and does not give the desired effect to the silver.
• avoid holding a silver piece over a steel anvil. Accidentally filing the anvil will make the file dull.
• use files only on silver, copper, or brass (not steel, wax, or clay)
• don’t use files as a punch or pry bar.
Disc cutters:
• only cut 18 gauge or thinner
• anneal beforehand!
• always shim the other side with a piece of the same gauge
• swivel handel out of strike zone before punching
• use burlife on punch blade
• use brass head hammer
• never, never, never hammer the blade side of the punch!
Pliers:
• use only on silver, copper, or brass.
• don’t use to grind, saw, or polish
Metal Cutter:
• cut 18 gauge or less
• only silver, copper, and brass
Bonny Doon Stakes
• may only be used with Delrin or Urethane hammers
• are to be mounted in the vertical vise with angle fiting in the notch.
Flexi-shaft or Micro Machine:
• always support your work with a wood block for drilling (don’t drill into bench or bench pin)
always put bits back-leave handle empty for the next person
never run at full speed.
Polishing:
• don’t mix compounds and wheels. polishing compounds in Studio 2 have dedicated wheels.
• always have a clean piece of metal before starting to polish (filings or sanding dust get stuck in polishing wheel and cause scratches on any piece forever after.
• clean piece with toothbrush and detergent between polishing compounds to not cross contaminate, which also causes scratches forever after.
• put wheels and compounds back in their bins
• clean screen in back of hood.
Bench Grinder:
• wear goggles and dust mask
• clean up dust after use
Torch and Torch Station:
• always hold torch upright when lighting or adjusting
• always light with a “polite hiss” then turn up.
• don’t bring tools to the torch station (they get wet!)
Take Care of “Millie”:
• NO WATER! Water will kill her.
• No textures other than designated pattern plates
• wipe rollers before using
• make sure metal is clean and dry before rolling.
• oil rollers after use
Steps For Using Pattern Plates In Millie:
1. Wipe rollers before using.
2. Anneal metal.
3. Clean and dry plate and metal.
4. Best if metal is size of plate.
(if smaller piece is used force must be reduced)
5. Place metal and plate between rollers -tighten until snug.
6. Make note of number on the mill gauge.
(this is the dead pass reading)
7. Open rollers slightly to remove the stack.
8. Close rollers back to the dead pass reading. Then close an additional 10-15 units.
9. Roll metal with pattern plate.
10. Wipe down rollers and metal plate. Oil.
Tip: rolling too tight will not improve the embossing but will wear out the plate prematurely.
The Hydraulic Press
• don’t use it unless you took a class
• no steel or iron objects in the press (other than dies)
• don’t overpress (based on the application)
• ask for help
Safety:
• wear goggles when using torch, drill, bench grinder, and polisher
• wear dust mask when appropriate
• wear gloves when using chemicals
• wear ear protection (for loud hammering)
• wear closed toed shoes
Other dos and don’ts:
• don’t use scissors to cut metal
• don’t use tools that you don’t know what they are for (take a class)
• don’t put food in the trash (put this outside)
Let’s keep the studio in good shape:
• when something goes wrong or breaks, tell someone!
• if in doubt, ask someone
• put tools back where they belong
• clean off bench before you leave
• sweep around your bench if you made a mess
• dry off around the sink or pickle if you splashed